Table of Contents
GCF provides simple and robust framework for creating component based applications. A component, in GCF, is an entity that makes available one or more objects that can work in tandem with objects offered by other components in the application.
Components are loaded explicitly by an application. An application can invent its own mechanism for figuring out what components to load. It could for example hard-code names of components to load, or it could read them from a file, or it could load all components from a given directory. We refer to such applications (the ones that load GCF components) as GCF Applications.
Suggested video:
Using GCF
GCF is simply a Qt/C++ library. Therefore using GCF would be like using any other C++ library in your Qt Application. Please read the article on " \ref gcf_howtoinstall " to understand ways to setup GCF on your computer.
It is important to remember at this point that you must
- Setup the
GCFDIRenvironment variable to point to the source directory of GCF 3. After setting up this environment variable, you must be able to find - Setup the
QMAKEFEATURESenvironment variable to point to $GCFDIR/QMakePRF folder.$GCFDIR/QMakePRF/GCF3.prf - On Windows, set
PATHenvironment variable to includeGCFDIR%/Binary - On Linux, set
LD_LIBRARY_PATHenvironment variable to includeGCFDIR%/Binary - On Mac, set
DYLD_LIBRARY_PATHenvironment variable to includeGCFDIR%/Binary - Restart your computer (or atleast Qt Creator)
- Note
- Environment variables are best set in .bashrc on Linux and Mac, so that they apply across login sessions.
Once setup, you can include GCF in your applications by simply including the following line in your project file.
CONFIG += GCF3
NOTE: if for some reason the above CONFIG line doesnt work, then you can explicitly include the prf file as follows
include($$GCFDIR/QMakePRF/GCF3.prf)
Key Concepts
The following key-concepts are critical for understanding GCF and the application architecture it proposes. We recommend that you read this section even if you are a seasoned GCF developer.
- Modules in GCF
- GCF Application
- GCF Component
- GCF Component Settings
- GCF Component Content
- GCF Application Object Tree
For a comprehensive explanation of the component model offered by GCF, please read an article on that here.
Modules in GCF
One of the central changes in version 3 of GCF is that it is now modular. GCF is now spread across the following modules
- GCF3 - core of GCF. Contains all component management mechanisms and a few helper classes.
- GCFGui3 - offers support for GUI components. By default GCF3 offers support for components that use
QtCoreonly. If you are writing GUI applications; you must link againstGCFGui3module. - GCFQuick3 - offers support for QML components. [NOTE: This module is available only for Qt 5]
- GCFIpc3 - offers support for inter-process communication between your GCF applications.
If you want to use any of the above modules, you can simply add the module name to CONFIG line in the project file OR include the corresponding prf file. For example:
include($$GCFDIR/QMakePRF/GCFGui3.prf) # for using the GCFGui3 module

# OR

CONFIG += GCFQuick3
GCF Application
The function of a GCF application is to provide a base component (also called application component), onto which all other components will merge their content objects; AND to load all components required for the application. Unlike GCF 2.x, in version 3 - you will have to create your own mechanism to figure out what components to load.
Your application should be written such that it links against GCF3 OR GCFGui3 OR GCFQuick3 and creates an instance of any one subclass of GCF::ApplicationServices.

Subclasses of GCF::ApplicationServices bring both GCF and Qt application functionality your application. For instance
- GCF::Application brings
QCoreApplicationand GCF::ApplicationServices to your applications. Applications written using this class can load only components that are written usingGCF3. - GCF::GuiApplication brings
QApplicationand GCF::ApplicationServices to your applications. Such applications can load bothGCF3components andGCFGui3components. [NOTE: such applications cannot loadGCFQuick3components] - GCF::QmlApplication brings
QGuiApplicationand GCF::ApplicationServices to your applications. Such applications can load bothGCF3components andGCFQuick3components. [NOTE: such applications cannot loadGCFGui3components]
In the rest of this document the term 'GCF application' AND 'application' will mean an executable Qt application that has an instance of GCF::Application OR GCF::GuiApplication OR GCF::QmlApplication.
GCF Component
Components are the building blocks of a GCF application. Components are basically instances if of GCF::Component (or its subclasses GCF::QmlComponent, GCF::GuiComponent). Instances of components can be
- created explicitly - by creating instances of your component classes and loading them using the GCF::Component::load() method.
- loaded dynamically from shared objects (or DLLs) - by making use of the GCF::ApplicationServices::loadComponent() function.
To load components explicily you can either package your component class as a static library and link your application to it OR implement your component classes within your application codebase itself OR by explicitly link to a component (shared) library, such that its constructor can be accessed from your application.
To load components dynamically you must ensure that the component is installed in a known location ( GCF::searchPathsForLibs() ) AND that all dependencies of the component are available in PATH% or $LD_LIBRARY_PATH or DYLD_LIBRARY_PATH. You must also ensure that such components are "exposed" using the GCF_EXPORT_COMPONENT macro.
GCF Component Settings
Every component can optionally provide one settings file (in INI format). This settings file is read and written into during the course of the components life time. Read Component loading (or initialization) for more information.
GCF Component Content
Every component can optionally provide a content file (in XML format). The content file will list out names and relationships of all content objects offered by the component. Read Content File for more information.
GCF Application Object Tree
One of the key objects that an application (instance of a subclass of GCF::ApplicationServices) object creates is object-tree (which is an instance of GCF::ObjectTree). Content objects exposed by all components are registered in this object tree. The object tree can be accessed using GCF::ApplicationServices::objectTree() method.
The root node of this object tree contains a pointer to the application object, which could be an instance of GCF::Application OR GCF::QmlApplication OR GCF::GuiApplication.
Immediate children of this root node normally contain pointer to a component. Put in another way, if you application loads 20 components then there will be 20 child-nodes (GCF::ObjectTreeNode) of the root node in the object-tree; each node containing a pointer to one component. We shall call such nodes as component nodes.
Immediate children of component nodes contain points to content objects exposed by the component either via Content File or explicitly added via GCF::Component::addContentObject() method. We shall call such nodes as content-object nodes.
There could be additional nodes in the object-tree; but the above kinds of are minimum.
Against each node we have a QVariantMap dictionary. This dictionary contains a set of key=value property-value pairs. The content of this dictionary is normally loaded while parsing the Content File or via the third parameter of GCF::Component::addContentObject(). Object-tree-node for an object can be queried using GCF::ApplicationServices::node() method. And from that node the QVariantMap information dictionary can be fetched (or even altered).
In the rest of this document we will be using the term 'exposed object' a lot. The term 'exposed object' refers to an object that is registered into the application's object-tree. All components and their content-objects are 'exposed object's.
Simple Application example
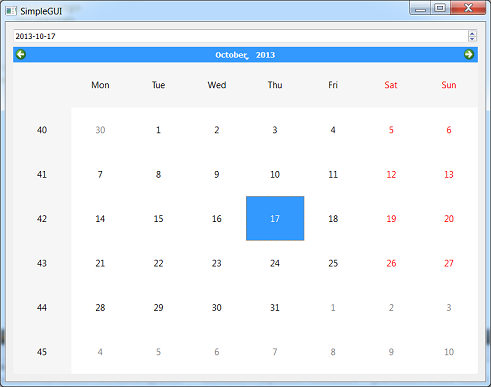
This example shows you all the key-concepts (described above) in action. The application is architected such that it offers a base component (or the application component) and loads two other components. One of the components offers a QDateEdit widget as content-object and the other a QCalendarWidget as content-object. Both these content-objects are merged into a QWidget with QVBoxLayout offered by the application component. Feature wise; changing the date in QDateEdit alters the current date in QCalendarWidget and vice versa.
Through this example you will come to know
- How to create a GCF application, implement an application component and instantiate it.
- How to create dynamically loadable components and load them from the application
- How to authoer content-files such that content-objects can be merged with other components
- How to create signal-slot connections from the content-file
- How to write project files for applications and components
- How to organize directory structure of your project
At the end of this tutorial you will be able to see a window like the one shown below and interact with it.
Following sections are intented to be used as a hand-holding guide. Please follow the instructions proposed in the following section and actively participate in creating the example application. At the end of it, you will have an understanding of all key-concepts in GCF 3.
Directory Structure
We recommend the following directory structure
- SimpleApplication # project folder
  - Binary # directory into which application binary is dumped
    - Components # directory into which components are dumped
  - Application # source code of the application
  - CalendarComponent # source code of calendar component
  - DateEditComponent # source code of date-edit component
Please create the above directory structure.
$ mkdir SimpleApplication
$ cd SimpleApplication
$ mkdir Binary
$ mkdir Application
$ mkdir CalendarComponent
$ mkdir DateEditComponent
$ cd Binary
$ mkdir Components
$ cd ..
$ touch SimpleApplication.pro
$ touch Application/Application.pro
$ touch CalendarComponent/CalendarComponent.pro
$ touch DateEditComponent/DateEditComponent.pro
SimpleApplication.pro
Type the following contents into SimpleApplication.pro
TEMPLATE = subdirs
CONFIG += ordered

SUBDIRS += \
    Application \
    CalendarComponent \
    DateEditComponent
Essentially you are creating a subdirs Qt project and defining it as a collection of three sub-projects: Application, CalendarComponent and DateEditComponent.
SimpleExample - Application
The application offers a base (or application) component. The only content object offered by this component is a QWidget window, that has a QVBoxLayout installed on it. This way content-objects from other components added to this window show up one below the other.
AppWindowComponent class
Create a AppWindowComponent class as follows in a file called AppWindowComponent.h.
- See Also
- GCF::GuiComponent
- GCF::Component::contentLoadEvent(), GCF::Component::activationEvent() and GCF::Component::deactivationEvent()
- GCF::GuiComponent::loadWidget()
AppWindowComponent.xml - Content file
AppWindowComponent::contentLoadEvent() was implemented in AppWindowComponent class to load a AppWindowComponent.xml content file. Type the following content into this XML file.
<content>
    <object name="Window" type="widget" windowTitle="SimpleApplication" layout="vertical">
        <property>
            <key>minimumWidth</key>
            <value>800</value>
        </property>
        <property>
            <key>minimumHeight</key>
            <value>600</value>
        </property>
    </object>
</content>
The content file exposes the object with name Window of type widget. Sets the title of Window object as "SimpleApplication". It also sets the minimum width and minimum height of the Window as 800 and 600.
Application.qrc - Resource file
AppWindowComponent::contentLoadEvent() expects the content file to be available in the resource file system as :/AppWindowComponent.xml. For this purpose, create a Application.qrc with the following contents.
<RCC>
    <qresource prefix="/">
        <file>AppWindowComponent.xml</file>
    </qresource>
</RCC>
The main() function
The main() function is where we bring it all together. Type the following code into a Main.cpp file.
The Application.pro file
At this point the directory structure is as follows
- SimpleApplication
  - Binary
    - Components
  - Application
    - Application.pro # empty
    - Application.qrc
    - AppWindowComponent.h
    - AppWindowComponent.xml
    - Main.cpp
  - CalendarComponent
    - CalendarComponent.pro # empty
  - DateEditComponent
    - DateEditComponent.pro # empty
Type the following contents into Application/Application.pro
CONFIG += GCFGui3
CONFIG -= app_bundle
TEMPLATE = app
DESTDIR = $$PWD/../Binary
TARGET = SimpleApplication

SOURCES += Main.cpp
HEADERS += AppWindowComponent.h
RESOURCES += Application.qrc
OTHER_FILES += AppWindowComponent.xml
With this your application is now ready to compile. To compile your application run the following commands on a terminal (or command prompt).
$ cd path/to/SimpleApplication
$ qmake -recursive
$ make
At this point you can execute the Binary/SimpleApplication exeuctable. It will launch and show a blank window. This is because components DateEditComponent and CalendarComponent are not yet available.
Logs
GCF has an internal logging engine, through with it logs a lot of information into a log file. The logs are generated into a directory called Logs under GCF::applicationDataDirectoryPath(). Everytime your GCF application is launched, a new log file is created. To know more about logging please read the class documentation of GCF::Log.
The calendar component project
The calendar component would make available a QCalendarWidget content-object that would be merged into Application.AppWindowComponent.Window.
The CalendarComponent class
The CalendarComponent class is defined as follows in CalendarComponent.h
The CalendarComponent class requests loading of :/CalendarComponent.xml settings file and offers a QCalendarWidget instance against "Calendar" name.
We need the component class to be 'exported' from the shared-library. For this we type the following code in CalendarComponent.cpp
Using GCF_EXPORT_MACRO will ensure that the component class can be instantiated by a GCF Application. The macro basically declares a special "C" function that is used by GCF::ApplicationServices::loadComponent() to create an instance of your component.
The CalendarComponent.qrc file
CalendarComponent::contentLoadEvent() expects the content file to be available in the resource file system as :/CalendarComponent.xml. For this purpose, create a CalendarComponent.qrc with the following contents.
<RCC>
    <qresource prefix="/">
        <file>CalendarComponent.xml</file>
    </qresource>
</RCC>
The CalendarComponent.xml content file
Content file of this component will be as follows
<content>
    <object name="Calendar" type="widget" parent="Application.AppWindowComponent.Window" />
</content>
Notice how we make use of the type attribute to declare that the content-object is of type widget. Also notice the use of parent attribute to request merging of the Calendar content-object with Application.AppWindowComponent.Window.
The CalendarComponent.pro project file
The project file of calendar component will contain the following
DESTDIR = $$PWD/../Binary/Components
TEMPLATE = lib
CONFIG -= app_bundle
CONFIG += GCFGui3

HEADERS += CalendarComponent.h
SOURCES += CalendarComponent.cpp
OTHER_FILES += CalendarComponent.xml
RESOURCES += CalendarComponent.qrc
At this point we have the CalendarComponent ready. But we still need the DateEdit component to complete SimpleApplication.
The date-edit component project
There is not much difference between the calendar-compont and the date-edit component. You start off by creating a DateEditComponent.h file with the following class definition
Next you create a DateEditComponent.cpp file to expose the component class
Next you create a DateEditComponent.qrc resource file as follows
<RCC>
    <qresource prefix="/">
        <file>DateEditComponent.xml</file>
    </qresource>
</RCC>
Next you create a DateEditComponent.xml content file as follows
<content>
    <object name="DateTime" type="widget" parent="Application.AppWindowComponent.Window"
            layoutPosition="0" > <!-- so that the date-time shows at the top -->

        <connection>
            <sender>clicked(QDate)</sender>
            <receiver>CalendarComponent.Calendar::setSelectedDate(QDate)</receiver>
        </connection>
        <connection>
            <sender>CalendarComponent.DateEdit::clicked(QDate)</sender>
            <receiver>setDate(QDate)</receiver>
        </connection>

    </object>
</content>
Notice the use of connection XML elements to install signal/slot connections. Read Content File for more information.
Finally you create DateEditComponent.pro project file as follows
DESTDIR = $$PWD/../Binary/Components
TEMPLATE = lib
CONFIG -= app_bundle
CONFIG += GCFGui3

HEADERS += DateEditComponent.h
SOURCES += DateEditComponent.cpp
OTHER_FILES += DateEditComponent.xml
RESOURCES += DateEditComponent.qrc
At this point the directory structure is as follows
- SimpleApplication
  - Binary
    - Components
  - Application
    - Application.pro
    - Application.qrc
    - AppWindowComponent.h
    - AppWindowComponent.xml
    - Main.cpp
  - CalendarComponent
    - CalendarComponent.pro
    - CalendarComponent.h
    - CalendarComponent.cpp
    - CalendarComponent.qrc
    - CalendarComponent.xml
  - DateEditComponent
    - DateEditComponent.pro
    - DateEditComponent.h
    - DateEditComponent.cpp
    - DateEditComponent.qrc
    - DateEditComponent.xml
With this your application is now ready to compile. To compile your application run the following commands on a terminal (or command prompt).
$ cd path/to/SimpleApplication
$ qmake -recursive
$ make
Now launch the Binary/SimpleApplication executable and notice the output. You will get a window as shown below.
Changing date in QDateEdit widget changes the date in QCalendarWidget and vice versa.