Table of Contents
GCF Investigator is a tool-set that allows you to record, edit and play automated test scripts for GCF applications. Investigator is used only for creating UI test cases. For all other kinds, you can use QtTestLib or any other testing tool of your choice. The tool-set consists of the following
- Investigator Agent Component - this component is loaded into an application to either record or run a test case.
- Recorder - this program loads the agent component into an application and triggers record of a test case.
- Runner - this program loads the agent component into an application and triggers running of a test case.
This page explains what Investigator can do and what it cannot do with the help of tutorials and examples.
Tutorial
Consider a simple GCFGui3 application that when launched shows a window as follows.
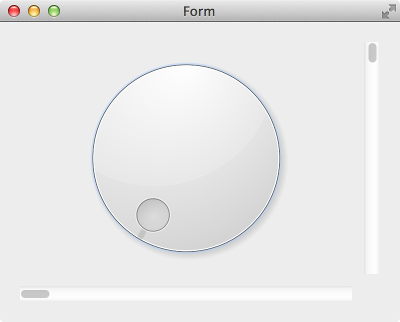
In this application we have connected signals and slots between the sliders and dial in such a way that their values are always configured to be in sync. For instance if the value of dial is changed, then the values of the slider also change. The form itself is designed in Qt Designer. The application simply loads the form and shows it.
Applications that are being tested using GCF Investigator are called AUT (or Application Under Test). In the next section you will see how to structure code of your AUT.
Implementing the AUT
Shown below is the code of an AUT that would load the form as described before.
The following paragraphs explain each aspect of the main() function implementation.
You start by creating an instance of GCF::GuiApplication as follows.
Then you create a formWindow and show it. It is important to create formWindow on the heap; because later on you will be adding the form window to a component as a content object. GCF deletes all content objects when the component is unloaded (which happens when the application is shuting down). We dont want GCF to attempt deleting an object on the stack!
Next you create a GCF::Component instance and add the formWindow as a content object to it. This part is important because GCF Investigator expects to find root windows in the object-tree of the application.
Finally, you should make use of the processArgumentsAndExec() function to run the event loop of your application. This part is done to ensure that the –loadComponents command-line argument is parsed and processed. It is through this command-line argument that the Recorder and Runner tools reqest loading of the Agent component into your AUT. NOTE: if processArgumentsAndExec() is not used - then you will not be able to record or run test case scripts in your application.
Creating a UI test script for the AUT
To create a AUT test script, launch the Recorder tool from the command prompt as follows.
$ cd /path/to/aut-binary
$ $GCFDIR/Investigator/Recorder ./AUT TestScript1.js
- Note
- Here
$GCFDIRrefers to an environment variable that points to theBinaryfolder of the directory where you have compiled GCF3. -
Here
AUTis the name of the application executable file.
When you launch Recorder, as described above, the following happens
- Recorder will inject Agent component into the AUT and trigger its loading.
- Recorder will send a request for recording of all user actions on the AUT into a script called
TestScript1.js
Suppose you click on the dial in the AUT and notice its value changing. You then close the application and open TestScript1.js in a text editor. You will notice the following code
- Note
- The code generated on your computer may be slightly different.
Later, you can read more about test script syntax and the environment in which the scripts are run. But at this point it is enough to know
test_xxx()functions in the test script are called one after the other, when the test script is run.- the
object()method allows you to reference named objects in the application - you can trigger events by using methods like
mouseClickAtPos() - you can introduce spin waits using the
wait()method
Adding validation checks
Now suppose that you want to include validation checks in the script. Lets say you wanted to verify ane ensure that values of dial, horizontal and vertical sliders are in sync. You would modify the test script code as follows
The verify() method passed the test function if the condition passed in it was true. It fails the test function and reports it otherwise. You can learn more about these functions in a later section.
Running the test script
You can now run the test script using the Runner tool as follows
$ cd /path/to/aut-binary
$ $GCFDIR/Investigator/Runner ./Tutorial TestScript1.js
********* Start testing of Tutorial *********
Using GCF 3.0.0 on Qt 5.1.1
Scheduling test-script 'TestScript1.js' for execution after 0 seconds
Running script 'TestScript1.js'
test_function {
    Dial value is now: 45
}
SUCCESS:
********* Finished testing of Tutorial *********
When you launched the Runner tool, as described above, the following happend
- Runner injected Agent component into the AUT and triggered its loading.
- Runner then requested for
TestScript1.jsto be loaded and executed. - Agent component, which was loaded into the AUT, processes the
TestScript1.jsfile and exectes alltest_xxx()functions. - It then dumps the test results to console
Example - Calculator Application
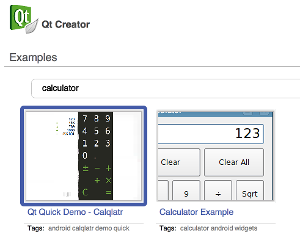
Qt comes with a standard inbuilt 'calculator' example. Lets alter the code of that example a little bit and see how we can use GCF Investigator to test it. Start Qt Creator and open the 'Calculator Example'.
After opening the example, compile and execute it. Just to make sure that it works.
You can now start GCFying the application by altering the project file (calculator.pro) as follows
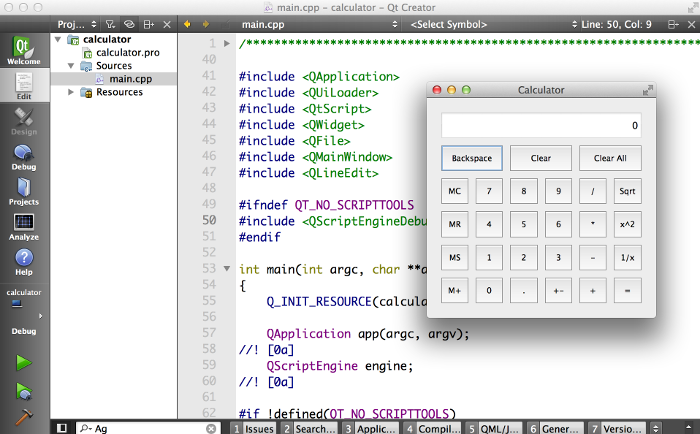
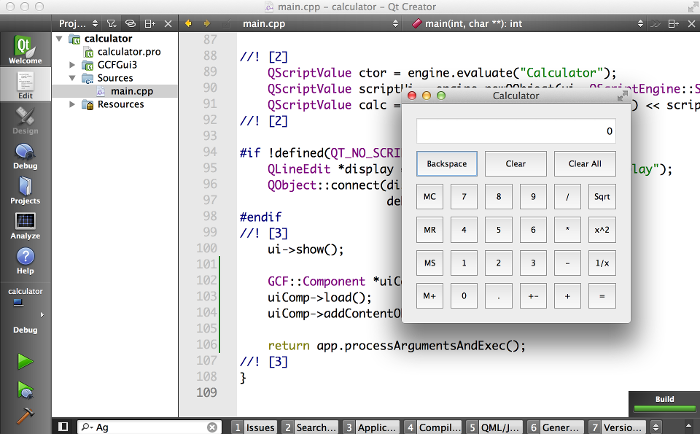
Next, alter the main.cpp file as follows
Now compile and execute the application. Just to make sure that it works after all the modifications.
What you have accomplished with all these changes is that you have made the calculator example testable with Investigator.
Record test script
You can launch the Recorder tool to start recording all user actions into a test case.
$ cd /path/to/calculator-binary
$ $GCFDIR/Investigator/Recorder ./calculator TestScript1.js
Suppose that you wanted to test whether the SQRT button on the calculator works properly or not. You could the calculator program and "feed" user actions to compute the square-root of say 198; and have Recorder capture all the user actions into a script. When you open TestScript1.js; you will find the following auto-generated code
Insert validation code
At the moment the Recorder doesnt capture user actions in a optimized way. So some edits are required. Shown below is a modified (and shorter) version of the same code.
The above code is now easier to follow. It simulates mouse click on 1, 9 and 8 buttons. Ensures that the display is showing "198". Then it sumulates mouse click on the square root button and verifies that the result shown in the square-root is appropriate.
Run the test script and validate the application
You can now make use of Runner to run the test script and check if the application passes the test.
$ cd /path/to/calculator-binary
$ $GCFDIR/Investigator/Runner ./Calculator TestScript1.js
********* Start testing of Calculator *********
Using GCF 3.0.0 on Qt 5.1.1
Scheduling test-script 'TestScript1.js' for execution after 0 seconds
Running script 'TestScript1.js'
test_function {
    FAILED at line 21: Incorrect square root of 198
}
FAILURE: 1 of 1 test case(s) failed
********* Finished testing of Calculator *********
The test case failed because the calculator uses Math.sqrt() javascript function to evaluate square root of 198. And that function returns 14.071247279470288; a value more precise than 14.0712472795. You can either perform a verification with error tolerance or compare the result directly against Math.sqrt(198). The following code snippet shows how to do the latter
Now use Runner to run the test script and check if the application passes the test.
$ cd /path/to/calculator-binary
$ $GCFDIR/Investigator/Runner ./Calculator TestScript1.js
********* Start testing of Calculator *********
Using GCF 3.0.0 on Qt 5.1.1
Scheduling test-script 'TestScript1.js' for execution after 0 seconds
Running script 'TestScript1.js'
test_function {
}
SUCCESS:
********* Finished testing of Calculator *********
Sure enough it does!
GCF Investigator - Agent
Agent is a GCF component that can be loaded into any GCF application to either record user actions into a script or run a test script and print results. It is a light-weight component that makes a AUT testable.
The Agent component can be loaded explicitly by the AUT as follows
But that is a non-standard way to load the Agent component. A better way is to write your AUT such that it makes use of the GCF::Application::processArgumentsAndExec() function to trigger the event loop. You can then inject the Agent component into the application by making use of the –loadComponents commandline argument.
$ cd /path/to/aut
$ ./aut --loadComponents:Investigator/Agent
Command line parameters
When you load the Agent component into a AUT, it looks for certain command line arguments passed to the AUT. If none of the command line arguments are found, then the Agent will trigger AUT to quit immediately.
| Parameter | Description |
--record |
Requests Agent to record user actions into a test script. The script will be dumped on standard output when the AUT is closed, unless the --outputFile parameter is used. Example: $ ./AUT --loadComponents:Investigator/Agent --record |
--outputFile:<output-file-name> |
Requests Agent to dump the recorded test script into a file. Example: $ ./AUT --loadComponents:Investigator/Agent --record --outputFile:/path/to/output-file.js |
--testScript:<script-file-name> |
Requests Agent to process run the specified test script on the AUT. Example: $ ./AUT --loadComponents:Investigator/Agent --testScript:/path/to/test-script.js |
--testStartDelay:<n> |
Requests Agent to start processing the test script after n seconds. By default the test script is run immediately. Example: $ ./AUT --loadComponents:Investigator/Agent --testScript:/path/to/test-script.js --testStartDelay:10 |
Script environment
When Agent is used to run a test script, it creates an environment inside of which the script files are loaded and executed. This environment offers all enumerations defined in the Qt namespace (example: Qt.LeftButton, Qt.Key_A etc..). It also offers the following functions
- log(message)
- fail(message)
- object(path)
- interface(name)
- wait(milliseconds)
- waitForSignal(object,signal,timeout)
- waitForPropertyChange(object,property,timeout)
- compare(v1,v2,msg)
- verify(condition,msg)
- createSignalSpy(object,signal)
log(message)
This function can be used to log anything into the output of the test. The log will show up within the context created for the test function that is currently being run. Example:
When the above test script is executed, you would get the following result
$ cd /path/to/calculator-binary
$ ./Calculator --loadComponents:Investigator/Agent --testScript:script.js
********* Start testing of calculator *********
Using GCF 3.0.0 on Qt 5.1.1
Scheduling test-script 'script.js' for execution after 0 seconds
Running script 'script.js'
test_function {
    this is my log message
}
SUCCESS:
********* Finished testing of calculator *********
fail(message)
This function can be used to log a message and immediately mark the current test function as failed. The fail() function never returns to the caller. It immediately quits the test_function() and causes Agent to move on to the next test function. Example:
When the above test script is executed, you would get the following result
$ cd /path/to/calculator-binary
$ ./Calculator --loadComponents:Investigator/Agent --testScript:script.js
********* Start testing of calculator *********
Using GCF 3.0.0 on Qt 5.1.1
Scheduling test-script 'script.js' for execution after 0 seconds
Running script 'script.js'
test_function {
    log message before fail
    FAILED at line 3: fail message
}
FAILURE: 1 of 1 test case(s) failed
********* Finished testing of calculator *********
object(path)
This function is used to search for QObject instances in your application and return a reference to them for use in your test scripts. The function accepts as parameter the path of the object being searched. The path is a slash '/' seperated set of names that dig into the trees of objects in the AUT.
- The first component of path is complete name of an object in the AUT's GCF::ApplicationServices::objectTree(). Example:
"Application.Component.Object". - From then on each component of the path could be
- Name of a child object. Example:
"Application.Component.Object/childName/grandChildName" - Indexed class-name of the child object. Example:
"Application.Component.Object/QClassName[1]/AnotherClass[2]" - Mixture of the above. Example:
"Application.Component.Object/childName/QClassName[1]/grandChildName"
- Name of a child object. Example:
- Special names for special child objects
- If the path of an object leads to a
QAbstractScrollArea(or its subclasses), thenviewportwill fetch its viewport widget. Example"Application.C.O/QTreeView[0]/viewport"horizontalscrollbarwill fetch the horizontal scroll-bar of the scroll areaverticalscrollbarwill fetch the vertical scroll-bar of the scroll area
- If the path leads to a
QAbstractItemView(or its subclasses), thenviewport,horizontalsrollbar,verticalscrollbarwill work as it would for aQAbstractScrollAreamodelwill fetch the view's modeldelegatewill fetch the view's delegateselectionmodelwill fetch the selection model of the viewhorizontalheaderwill fetch the view's horizontal headerverticalheaderwill fetch the view's vertical header
- If the path leads to a
QGraphicsView(or its subclasses), thenviewport,horizontalsrollbar,verticalscrollbarwill work as it would for aQAbstractScrollAreascenewould fetch the view's scene- names of
QGraphicsObjectitems in the scene can be used to fetch items in the scene
- If the path leads to a
QQuickView(or its subclasses), thenenginewill return pointer to theQQmlEngineused by theQQuickView- names of context properties (set using
QQmlEngine::rootContext()->setContextProperty(...)) can be used to fetch object corresponding to the context property.
- If the path of an object leads to a
The object(string) function returns a object variable. Depending on the type of object returned certain functions and properties will be made available. For example if the returned object is a QWidget then you can access mousePress(), mouseClick(), mouseRelease() etc. The following table lists out all such object-type specific functions and properties.
| Object type | Functions |
QObject |
|
QWidget, QWindow |
|
QGraphicsObject |
|
interface(name)
This function takes as input name of a class or interface and returns an object that implements the interface. Example:
wait(milliseconds)
This function spin waits for as many milliseconds as specified in the parameter. During the spin-wait the event loop will be running.
waitForSignal(object,signal,timeout)
This function waits for emission of a signal in an object for a maximum timeout milliseconds duration. The function returns an object whose properties are parameters emitted by the signal. Example:
waitForPropertyChange(object,property,timeout)
This function waits for a change in property to occur in object for a max of timeout milliseconds The function returns value of the property, if a change was detected, false otherwise. Example:
compare(v1,v2,msg)
This function compares v1 with v2. If the values were equal then the function returns otherwise it prints msg and terminates the calling test function immediately.
verify(condition,msg)
This function does nothing if condition is true. It prints msg and terminates the calling test function immediately, otherwise.
createSignalSpy(object,signal)
This function creates a signal-spy on signal of object and returns the spy. On the returned spy object you can invoke
wait(timeout)function to wait fortimeoutmilliseconds for a signal emission to occur. The function would return true if a emission was detected within the timout, false otherwise.countproperty to find out then number of emissions captured by the spyat(index)function to fetch a array of parameters from theindex'th emissiontakeAt(index)function same as index, but this function removes theindex'th emission from the spyclear()function to remove all emissions from the spy
Example:
GCF Investigator - Test Script
The script executed by Agent component on the AUT is called "Test Script". Test scripts are JavaScript files that have a bunch of test_xxx() functions. These test functions are called one after the other, in the same order that they are declared. In addition to the test_xxx() functions, a test script can also contain the following optional functions
initTestCase()- this function is called before any other test function in the scriptinit()- this function is called before each test function in the scriptcleanup()- this function is called after each test function in the scriptcleanupTestCase()- this function is called after all test functions have been called in the script
NOTE: it is perfectly fine to have other functions in the test script. As long as they dont start with test_ they are not automatically called by the Agent component.
GCF Investigator - Recorder
The Recorder application simplifies the process of launching an AUT and recording user actions into a test script. Usage:
$GCFDIR/Investigator/Recorder <AUT> [output-test-script] [--autArgs <arg1> [arg2] [arg3] ...]
Here
AUTis a required command-line argument. It must contain the complete path of AUT.output-test-scriptis an optional command-line argument that could contain the path of the test script file into which the captured user actions are dumped.- Arguments passed after –autArgs are passed as command line arguments to the AUT as is
The advantage of using Recorder is that it can report AUT crashes on the terminal, to which you can respond and do something about.
GCF Investigator - Runner
The Runner application simplifies the process of launching an AUT and running a test-script on it. Usage:
$GCFDIR/Investigator/Runner <AUT> <test-script> [startup-delay] [--autArgs <arg1> [arg2] [arg3] ...]
Here
AUTis a required command-line argument. It must contain the complete path of AUT.test-scriptis required command-line argument that should contain the path of the test script file, which needs to be executed on the AUT.startup-delayis an optional command-line argument that would specify the number of seconds to wait before running the script on AUT.- Arguments passed after –autArgs are passed as command line arguments to the AUT as is
The advantage of using Runner is that it can report AUT crashes on the terminal, to which you can respond and do something about.